
DIY Deck and Fence Cuts Using a Miter Saw in Kanata
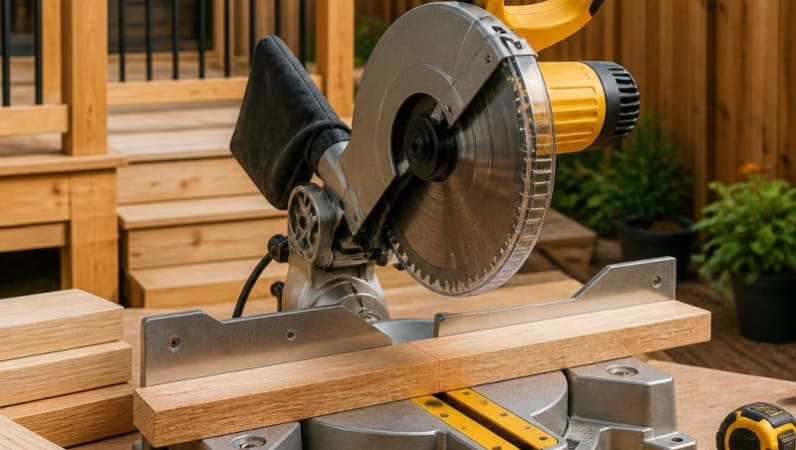
If you have a deck board that needs trimming, a fence panel that needs a clean angle, or a basement renovation that suddenly turned into a trim carpentry weekend, renting a miter saw in Kanata can make the whole project feel more manageable. A DEWALT 10-inch compound miter saw is one of those tools that quickly proves its value because it handles repeatable crosscuts, mitres, and bevel cuts with far less guesswork than a hand saw. In neighborhoods across Kanata, from family homes near Kanata Lakes to busy renovation projects in Stittsville-adjacent areas, homeowners often need a dependable saw for short-term work without wanting to store a large tool afterward. This is exactly where a used-like-new rental tool fits in well. It gives you the cutting power and stability you need while keeping the project practical.
The nice thing about this saw is that it is not just for experienced carpenters. If you are replacing a few fence boards after a storm, building a planter box, or finishing a room with baseboards and casing, the setup is approachable once you understand a few basic habits. The 10-inch blade is a useful size for common lumber and trim, and the compound cutting head helps when your project needs both mitre and bevel adjustments. In a place like Kanata, where weather can swing from wet spring conditions to dry summer building days, having the right tool on hand at the right time matters. Renting also keeps your garage from becoming a storage unit for tools you might only use a handful of times each year.
Why a DEWALT 10-inch compound miter saw is a smart fit for Kanata deck and fence work
Deck and fence projects tend to expose the limits of improvised cutting methods very quickly. A miter saw gives you a stable platform, a clear cutting line, and the ability to repeat the same angle over and over without drifting. That matters when you are matching multiple fence caps, trimming deck boards to the same length, or cutting posts and rails that need to line up cleanly. The DEWALT 10-inch compound miter saw is a practical rental choice because it combines power with a layout that many DIY users can understand fast. Its electric motor delivers consistent performance, which helps when you are moving through a stack of boards and do not want to keep pausing to fight the tool. The stable base also helps reduce wobble, which is especially useful if your work area is outdoors on uneven ground. For anyone renting a miter saw in Kanata, that extra stability can mean cleaner cuts and less wasted material.
Another reason this saw works well for local homeowners is that the common tasks around Kanata often involve a mix of outdoor and indoor finishing work. One weekend you might be replacing a few deck boards after winter wear, and the next you might be cutting trim for a basement refresh in a home near Beaverbrook or Glen Cairn. A single bevel compound saw is versatile enough to handle many of those jobs without becoming overly complicated. It is also a good middle-ground tool for people who want professional-looking results but do not need a full cabinet shop setup. The 10-inch blade is large enough for common lumber and many trim pieces, yet still manageable for a residential project. If your project list includes frame members, fence rails, or finishing boards, this size hits a very useful balance. It is the kind of rental that solves several problems at once.
Because the saw comes in used-like-new condition, you get a tool that has already been checked for practical usability while still feeling ready for real work. That matters when you are on a schedule, because DIY projects rarely happen in perfect conditions. A deck repair might be happening between rain showers, or a fence fix might be squeezed into one Saturday morning before the rest of the family uses the yard. The clear angle markings and miter detents make it easier to set common angles quickly, which saves time when you are repeating the same cut across multiple pieces. For simple framing or trim work, that consistency is often more important than fancy features you may never use. In a rental context, reliability and simplicity usually beat complexity. That is one reason this model has such broad appeal for homeowners in Kanata.
Fence work also tends to involve cuts that need to look straight and deliberate, especially if the project is visible from the street or backyard. Neat cuts can make even a modest repair feel polished. A saw like this helps you avoid jagged edges, awkward overlaps, and the frustration of repeated measuring. When you are working near established neighborhoods where curb appeal matters, clean finishing details go a long way. The compound action is especially useful when you need more than a basic square cut. Even if you are only doing one project, the saw’s combination of power, support, and readable measurements helps make the process less stressful. For many local renters, that peace of mind is part of the real value.
There is also a practical storage angle that people in Kanata appreciate. Many garages are already packed with bikes, winter tires, garden supplies, and all the other things that come with year-round home ownership in Ontario. Buying a saw for a single deck rebuild or fence repair can create a long-term storage problem that outlasts the project itself. Renting gives you access when the work needs to happen and removes the burden after the last board is cut. That convenience is easy to overlook until you realize how much space a full-size tool takes up. For occasional carpentry jobs, tool rental can be the more realistic choice. It keeps the focus on the project rather than the equipment.
In short, this saw is a strong match for homeowners who want dependable cuts without making their renovation more complicated. It supports the kind of work that comes up often around Kanata, whether that means a seasonal deck refresh, a fence replacement, or a trim job inside the house. Because it is straightforward to use and built for common residential materials, it helps first-time renters and experienced DIYers alike. If you are comparing options for a project that needs precision and repeatability, this DEWALT model offers a very sensible path forward. And when the goal is simply to get the job done cleanly and safely, that matters more than anything else.
Planning deck and fence cuts before you start the saw
The best miter saw results usually start before the blade ever spins. A little planning saves time, reduces mistakes, and helps you use your materials wisely. Begin by measuring each board carefully and writing the measurements down in a way that matches your project layout. If you are building or repairing a deck in Kanata, check each section for squareness because older structures often shift slightly over time. A board that looks like it should be a simple cut may actually need a small adjustment for fit. Mark each cut with a sharp pencil and label your pieces if you have several identical-looking boards. That simple habit helps you keep track of what has already been cut and what still needs attention. When you are working through a stack of lumber, organization is almost as important as the saw itself.
For fence projects, the layout stage is especially important because visible cuts can stand out from a distance. If you are trimming pickets, rails, or top caps, it helps to dry-fit the section first so you can see how the line behaves. In windy or damp conditions, which are not unusual during Ontario shoulder seasons, boards can shift while you are measuring. Try to measure on a flat surface when possible and double-check any angles before you commit. If you are replacing only part of a fence line, compare the new boards to the old ones so the finished section does not look uneven. The miter saw is very good at repeating angles, but it can only reproduce what you have planned accurately. A careful layout means fewer surprise adjustments later. That is one of the easiest ways to make the whole job feel smoother.
A useful habit is to make one test cut on scrap material before moving to your actual boards. The smart detail from the tool notes is worth following because a test cut confirms your angle and helps you see how the blade behaves in the material you are using. This is especially helpful if you are cutting finish trim for a deck railing or trying to match an existing slope. If the scrap cut looks off, you can correct it before wasting a longer board. Many experienced DIYers keep a few offcuts nearby for exactly this reason. It is a small step, but it often prevents a string of repeated mistakes. In practice, a test cut can save time, money, and frustration all at once. It also builds confidence for newer users who may be hesitant the first time they lower the blade.
If your project includes several repeated angles, group the cuts by type. For example, separate all square cuts, all left mitres, and all right mitres before you begin. That way, you can move through the work in logical batches instead of jumping back and forth between settings. The miter detents on this DEWALT saw are useful because they help you lock in common angles faster, which is ideal for framing and common residential carpentry. When you keep your workflow organized, the tool feels easier to use and your results become more consistent. This is particularly useful during deck rebuilds when you are trying to finish before weather changes. A focused setup keeps the project moving and lowers the chance of a wrong-angle cut.
Board support is another important part of planning. Long boards should be supported at the same height as the saw table so they do not sag while you cut. If the board droops, the cut angle can shift slightly and the end result may not sit flush later. This matters for trim pieces, fence caps, and anything that needs a clean visual line. A couple of stable supports can make a huge difference. If you are working alone, position the material before turning the saw on so you are not trying to hold and balance everything at once. Good support is one of those simple practices that feels minor in the moment but has a big effect on the finished product. It also makes the saw easier to handle for less experienced users. A steady board is a safer board.
Finally, think about your work area before you begin. Outdoor projects around Kanata often happen in driveways, garages, or backyards, and each location has its own challenges. A driveway may give you room to lay out long lumber, while a garage offers a more controlled environment but less space. Try to choose a flat area with enough room to move boards safely on and off the saw. Keep your cutting station clear of clutter so you are not stepping around tools or offcuts. If rain is in the forecast, plan how you will protect the saw and the lumber between work sessions. Local weather can change quickly, and a small amount of preparation can save your setup from getting wet or muddy. Better planning usually leads to better cuts.
Another important step is confirming that the material is suitable for this tool and this setup. The rental notes specify dry wood only, which is a detail worth respecting for both safety and cut quality. Pressure-treated material, masonry, and metal are not appropriate for this saw and should not be cut indoors. If you are unsure about a board or material type, take a minute to identify it before starting. Following the operator guide and checking the workpiece clamp also makes a difference, especially when you are trimming smaller pieces. A few minutes of planning can keep the whole project on track and reduce unnecessary risk. That is a habit every homeowner can benefit from, no matter how often they rent tools.
Safe setup and cutting habits that help first-time users
Safety is the part of the project that should never feel optional, especially when you are working with a powerful saw and spinning blade. Eye protection and hearing protection should be part of the setup from the beginning, not something you remember halfway through the first cut. A miter saw can send dust and small chips into the air, and hearing protection makes a difference when you are making several cuts in a row. It is also important to keep hands clear of the blade path at all times. That sounds obvious, but it becomes easier to forget when you are trying to steady a long board or move quickly through repetitive cuts. A calm pace is usually safer and more accurate. If you are new to power tools, take a few minutes to study the saw before starting. Understanding the controls reduces hesitation and helps the tool feel less intimidating.
The blade guard is another feature worth paying attention to because it is designed to cover the blade when the saw is raised. Before you cut, make sure the guard moves freely and returns to its covering position after each pass. This is a basic check that helps confirm the saw is operating as expected. The workpiece clamp is also valuable, especially for smaller pieces that could shift under pressure. Securing the board gives you a steadier cut and helps prevent the piece from twisting as the blade comes down. When the board stays put, your focus can stay on the cut line instead of on stabilizing the material. That tends to produce better results and a more comfortable user experience. For many renters, a good clamp is the difference between feeling nervous and feeling in control.
One of the best habits you can build is letting the blade reach full speed before lowering it into the wood. This is a simple instruction, but it makes a noticeable difference in the quality of the cut. A blade that is fully up to speed is more likely to glide cleanly through the material instead of grabbing or tearing the edge. That is especially helpful when you are working on visible trim or fence caps. Lowering the blade slowly and evenly also keeps the cut line cleaner. If you rush the motion, the tool may leave a rougher edge or increase the chance of kickback. Cutting smoothly is more important than cutting quickly. In real home projects, the best results usually come from steady repetition rather than speed.
It is also smart to keep the work area organized around the saw itself. Offcuts, loose screws, and scattered tools can create distractions or trip hazards. If you are outside, keep an eye on children, pets, and neighbors who might wander close to the cutting zone. A project in a Kanata backyard often happens in a living space that is still active, so it helps to set clear boundaries. Mark out a safe area if the job is going to take more than a few minutes. That makes it easier for everyone to understand where the cutting zone begins and ends. Good work habits are not just about the tool; they are about the environment around the tool. A clean area contributes to better focus.
Because this saw is intended for dry wood only, material choice matters for safety and for the saw’s condition. Wet lumber can bind more easily and may not cut as cleanly, so it is worth checking your boards before you start. If you are replacing deck material after rain, let the wood dry if possible rather than rushing into the cut. That extra time often pays off in a better finish and a safer experience. The same applies to pressure-treated boards that may have moisture content or treatments that are not ideal for every indoor setting. Keep the work outdoors or in a well-ventilated area, and do not cut metal or masonry with this saw. Those limits are there for a reason. Staying within them helps keep both the user and the equipment in better shape.
For people renting a miter saw in Kanata for the first time, it helps to think in terms of routine. Check the blade, secure the board, confirm the angle, let the blade spin up, make the cut, and wait for the blade to stop before lifting or removing material. That sequence becomes second nature after a few repetitions. It also reduces the kind of rushing that leads to mistakes. New users often discover that confidence comes from consistent habits, not from trying to be fast right away. The saw is designed to support clean repeatable work, and your process should do the same. When the setup is organized and the habits are sound, the tool becomes much easier to trust.
One small expert note: if you are cutting a visible finished edge, always look at which side of the blade is removing material and keep the nicest face oriented the way you want. That little bit of awareness helps reduce tear-out where it matters most. It is the kind of detail that separates a passable DIY result from a result that looks intentionally built. These are the kinds of practical touches that matter in real home improvement work. They also help explain why a miter saw rental is so useful for homeowners who want better results without overcomplicating the job.
Local project ideas for Kanata homeowners and weekend DIYers
Kanata has a strong mix of mature homes, newer subdivisions, and active family properties, which means there is always some type of cutting project happening. In older areas, homeowners often need to replace trim, repair worn deck boards, or refresh a fence line that has seen a few seasons of weather. In newer neighborhoods, the challenge may be finishing a basement, building shelving, or correcting a small detail after move-in. A miter saw is useful in all of those cases because it helps create clean, consistent cuts across a wide range of materials. The same rental tool can serve a back deck repair one weekend and an interior trim upgrade the next. That flexibility is why many local DIYers prefer to rent instead of buying. It keeps the tool matched to the job rather than forcing the project to fit the tool.
Deck repairs are especially common after winter, when freeze-thaw cycles can loosen boards or expose worn edges. A saw like this helps when you need to trim replacement boards to length, cut railing pieces, or shape end caps so the deck looks uniform again. If you are working on a family deck in a backyard near a school route or a park-heavy area, you may also want the finished structure to look tidy and safe because it gets seen every day. Clean cuts matter visually and structurally. A straight edge makes fastening easier and helps boards sit flush. The result is a deck that feels repaired rather than patched together. For homeowners trying to restore a usable outdoor space before summer gatherings, that is a big win.
Fence work is another place where this saw earns its keep. If the wind has loosened a few boards or a section needs to be replaced after general wear, the mitre saw helps produce exact pieces that fit without excessive trimming on site. Homeowners often underestimate how many cuts go into a fence repair until they are standing there with lumber stacked beside them. Rail ends, post caps, decorative top pieces, and pickets can all benefit from controlled cuts. In a place like Kanata, where backyards often serve as both living space and project space, getting the fence back into shape quickly can improve the whole feel of the property. It is less about perfection and more about making a space usable again.
Inside the house, the same tool is useful for baseboards, casing, shelving, and basement finishing. That matters in Kanata because many homeowners are balancing outdoor maintenance with indoor renovation work throughout the year. During colder months, when outdoor cutting is less appealing, the saw can support room-by-room updates inside a garage or ventilated workspace. When spring arrives, it transitions back to deck and fence work without needing a different approach. One saw, multiple seasons of use, and a broad range of tasks. That kind of versatility is exactly what makes tool rental practical for busy households. It helps projects stay realistic instead of turning into large equipment purchases.
If you are planning a project around a local event, family gathering, or outdoor season, timing matters more than many people expect. A backyard that needs repair before a barbecue, birthday party, or summer visit can feel much more urgent than one that can wait. Renting a miter saw locally gives you a convenient way to move from idea to action without long delays. It also reduces the chance of settling for rough cuts or shortcuts just to finish on time. In that sense, the tool supports the schedule as much as the carpentry. A little extra precision now can save you from a visible mistake later. That is especially helpful when the work will be seen by neighbors, guests, or family every day.
There is also a real advantage to having the right tool nearby instead of making repeated trips for cutting services or borrowing equipment that may not suit the project. Local access matters, particularly when you discover mid-project that a board is slightly too long or an angle needs a quick correction. Being able to set up and make that cut yourself keeps momentum on your side. It is one of the reasons renting a miter saw in Kanata makes sense for homeowners who value efficiency. The project stays in your hands, and the timeline stays more flexible. That can make the difference between a repair that gets finished and one that sits unfinished for another season.
For renters who are still learning, local projects also create a good opportunity to build confidence gradually. A small fence cap replacement is a better first project than a full deck rebuild, and a couple of trim cuts inside the house can teach the same principles without the same pressure. As your comfort grows, the saw becomes less mysterious and more useful. Many people discover that the first project feels the hardest because they are learning the tool, the second project feels easier because they know the workflow, and the third project feels almost routine. That learning curve is normal. The important thing is having access to a reliable saw when you are ready to try. For a lot of homeowners, that is the real benefit of a good rental experience.
Keeping your cuts clean and your project moving from start to finish
Once the saw is set up and the first few cuts are done, the focus shifts to staying consistent until the project is complete. That means checking your measurements often and resisting the urge to assume every board is identical. Lumber can vary slightly from piece to piece, and even small differences matter on a visible project like a deck stair trim or a fence cap. Keep your pencil, tape measure, and scrap material within easy reach so you can move efficiently between layout and cutting. It helps to work in stages instead of trying to measure, cut, and fasten everything at once. When the workflow is organized, your energy goes further and mistakes become less likely. The saw is capable of repeatable cuts, but your process is what turns that capability into a finished result.
Maintaining the blade area and keeping the saw clear of dust also helps the tool perform well throughout the job. The included dust bag is useful for capturing some of the debris, especially during a longer cutting session. Even so, it is a good idea to pause occasionally and clear the work surface so you can see your lines clearly. Dust can hide a pencil mark or make it harder to check a fit. A clean surface also reduces the chance of offcuts interfering with the next board. If you are working outdoors, wind can move sawdust and small scraps around, so organizing your space becomes even more important. A tidy setup keeps the project moving forward instead of forcing you to stop and correct avoidable mess. That is a simple habit, but it pays off quickly.
As the work continues, keep an eye on cut quality rather than only on speed. If an edge starts looking rough, check whether the board is supported correctly, whether the angle is set properly, or whether the blade is still suited to the material. The general-purpose carbide blade included with the saw is a versatile option for common lumber and trim, and it should handle the kind of residential work most Kanata renters need. If a cut does not look right, it is better to stop and inspect the setup than to force the remaining boards through with the same issue. Small corrections early prevent larger problems later. That is true whether you are cutting a single board or a full batch of lumber. A little attention to detail goes a long way.
Finishing the project also means knowing when to slow down near the end. It is common for DIYers to rush once they can see the finish line, but the final cuts are often the ones that matter most. A last trim board, end cap, or corner piece is usually highly visible, so take your time with those final measurements. If possible, compare the last pieces against the installed sections before committing to the final cut. That final check can reveal whether a board needs a hair more length or a slightly different angle. On a deck or fence, those finishing details are the parts that people notice first. A steady approach near the end of the project keeps the whole result looking clean and intentional.
Cleanup is part of the job too. Once you are finished cutting, collect offcuts, brush away sawdust, and inspect the area for loose screws, nails, or stray hardware. Returning the rental in good shape starts with how you handle it during the project. Wipe the saw down if needed, make sure the blade guard is functioning as expected, and store the accessories together so nothing gets misplaced. The blade wrench, clamp, and operator guide are all useful pieces to keep organized. Good cleanup habits make the next rental easier, whether that next project is another fence section or a basement trim job later in the season. They also create a better impression of the space you have been working in, which matters if your project is in a shared driveway or backyard area.
If you are not fully sure how to make a cut before you start, take a minute to review the operator guide and test the motion with the power off. That extra minute can help you understand how the saw moves and where the material will sit. People often underestimate how useful that dry run can be. It reduces hesitation and helps the actual cut feel more controlled. This is especially valuable for homeowners who only rent tools occasionally and want a smoother learning curve. The more familiar the process feels, the less stressful the whole project becomes. And in home renovation, less stress often means better results.
At the end of the day, the goal is not just to finish the cutting list but to finish it cleanly, safely, and with enough confidence to enjoy the result. That is why a well-kept, used-like-new DEWALT miter saw is such a useful rental choice. It helps you move through deck and fence cuts with enough precision to make the work look professional while still being approachable for a DIY user. For homeowners in Kanata who want reliable results without the burden of ownership, that combination is hard to beat. It is a tool that supports both the project and the pace of real life. And that is often exactly what a good rental should do.
For deck repairs, fence replacements, trim carpentry, and renovation work, renting a DEWALT 10-inch compound miter saw in Kanata offers a practical way to get accurate cuts without committing to a permanent tool purchase. Its power, stable base, clear angle markings, and compound cutting capability make it a strong fit for the kinds of projects local homeowners take on throughout the year. Whether you are working near Kanata Lakes, handling a backyard update in the west end, or finishing a basement before the next season begins, the right saw helps the job feel more manageable from start to finish.
The biggest takeaway is simple: plan carefully, support your boards, use the clamp when needed, and keep safety at the center of the project. If you follow those habits, a miter saw becomes less of a challenge and more of a dependable helper. For anyone renting a miter saw in Kanata, the value is not only in the tool itself but in the confidence it gives you to complete the work cleanly and efficiently. That confidence can be the difference between a half-finished project and one you are proud to show off when the job is done.
About The Author
